Monitoring Apache HTTPd with New Relic
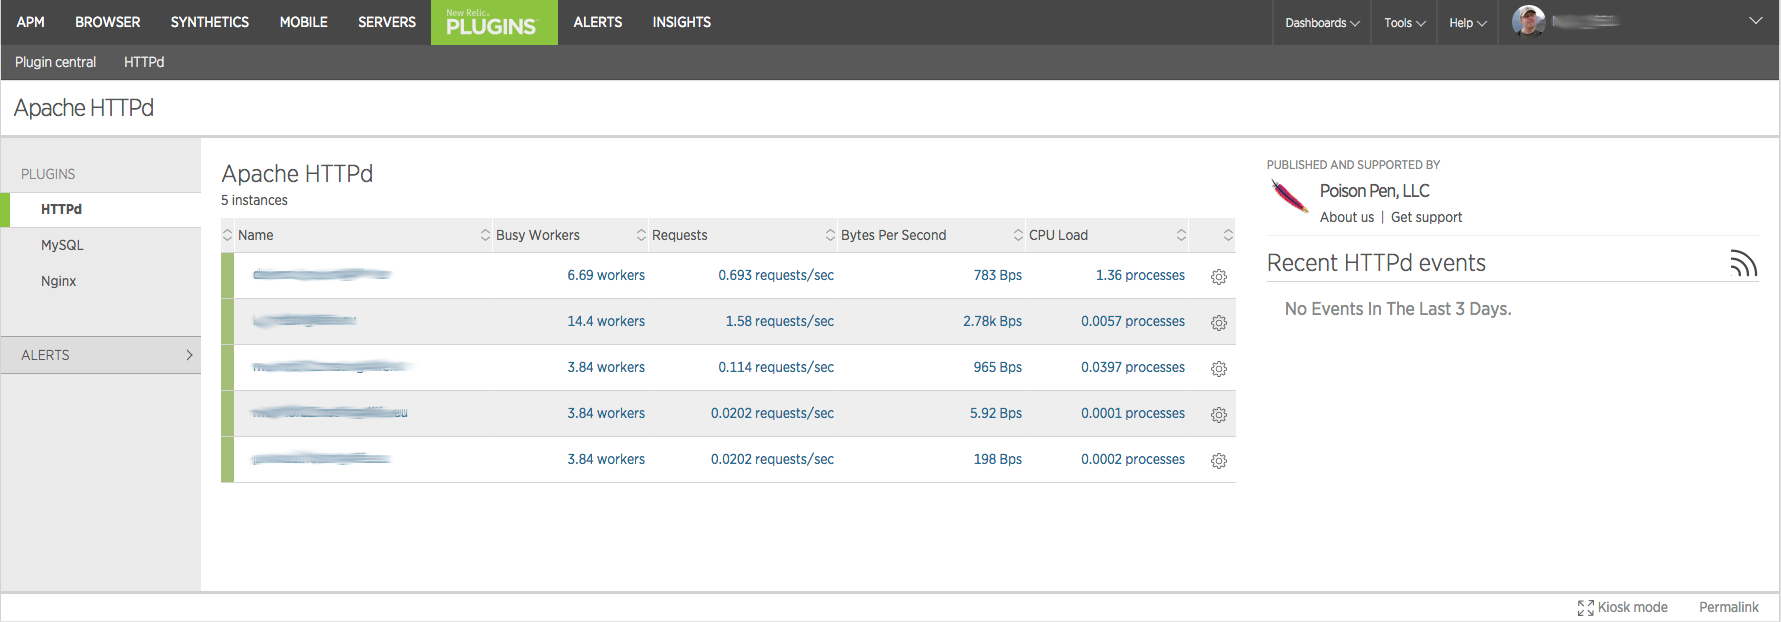
When figuring out what’s wrong with a sites performance it’s important to get facts about every aspect and component involved with that site. Apache is quite often used in front of java applications and it’s the app server for php applications. Bad apache configuration can make a site seem sluggish even when there are plenty of other resources available so it’s important to see what’s going on here. From the first screen of Apache HTTPd plugin you’ll get a nice overview of all your monitored apaches.
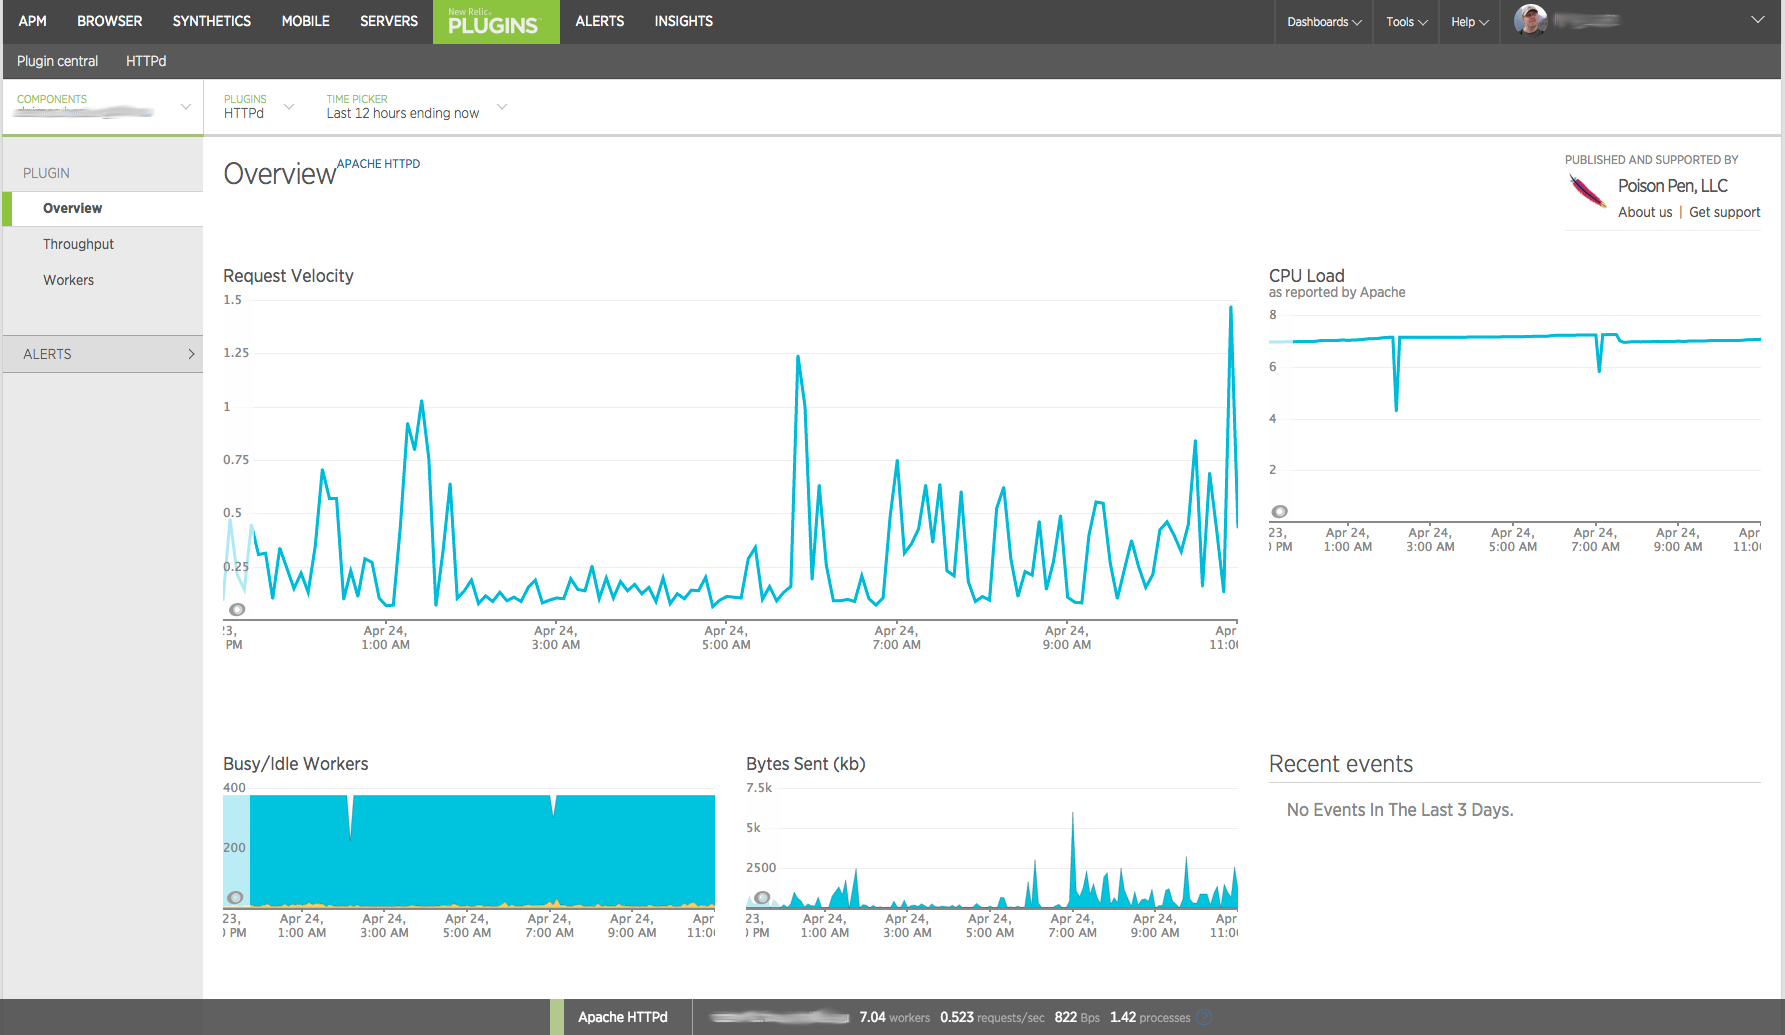
Drilling down to a single server overview shows request velocity, cpu load, busy/idle workers and even bytes sent over time.
Going to throughtput shows throughtput details over time.

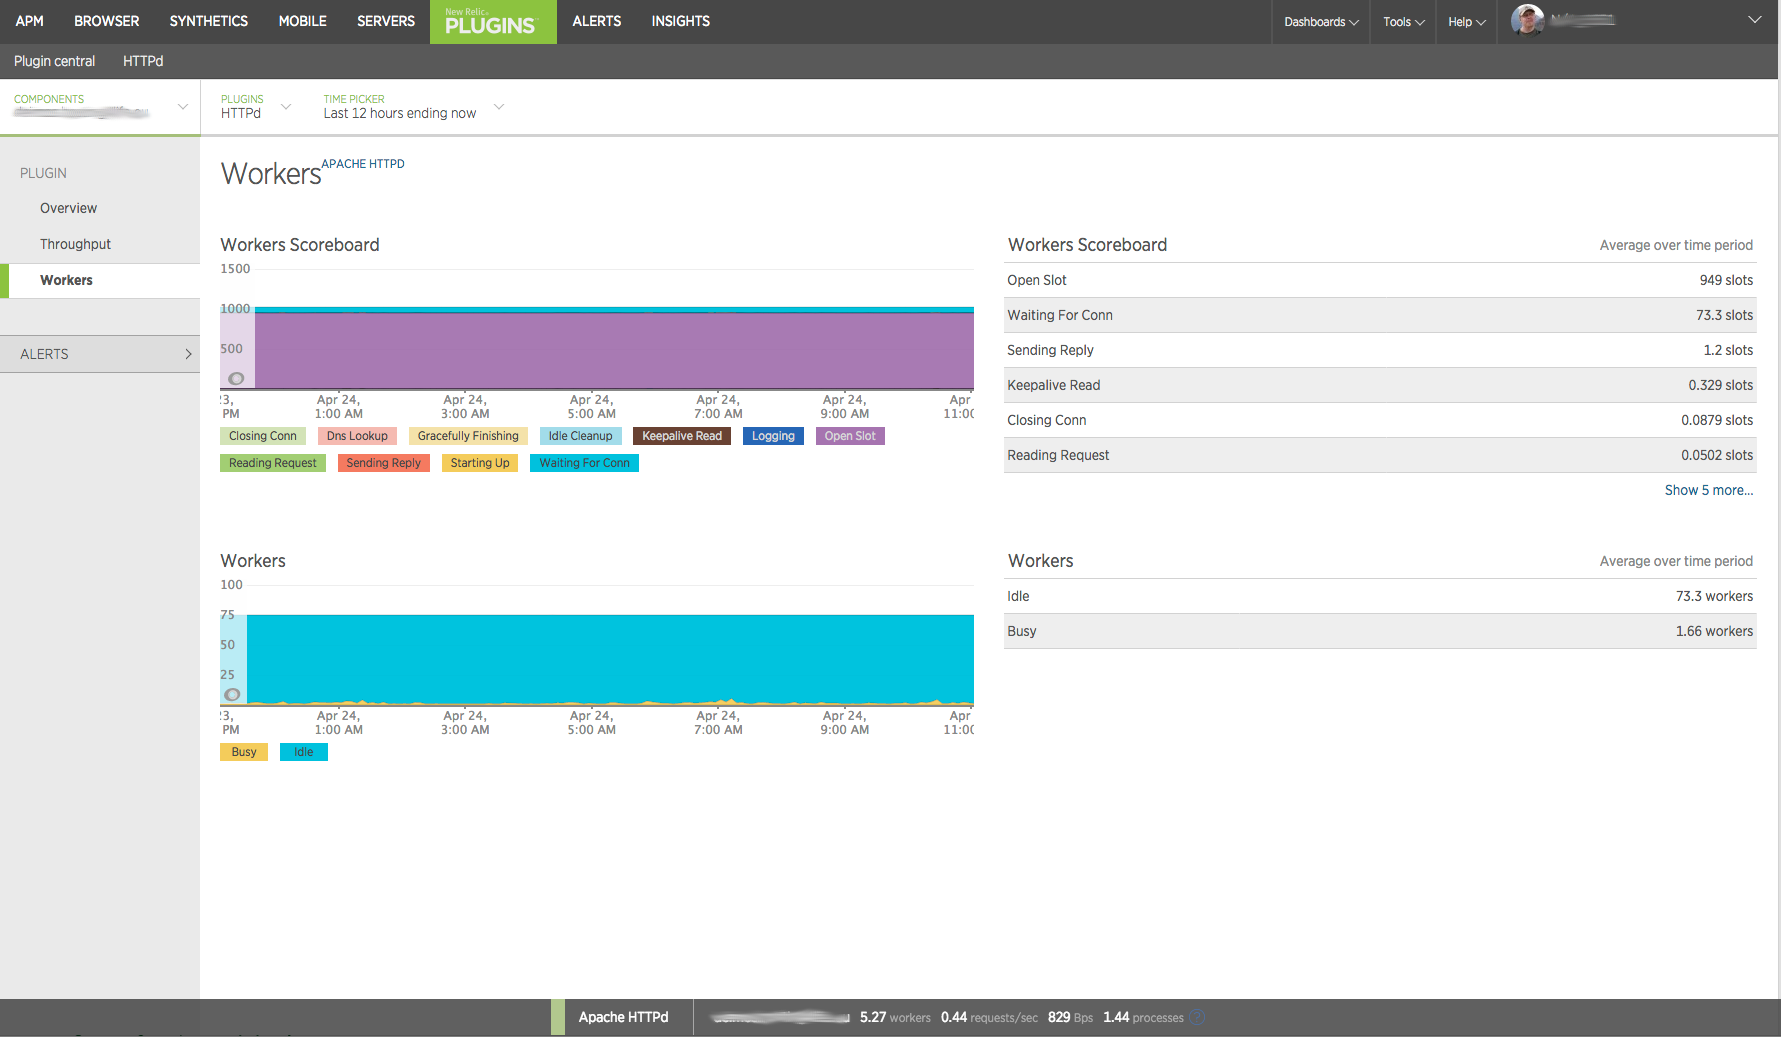
Workers section shows you what is happening with the workers. If you have a lot of busy workers you can see in what state their are and that might provide some insight to what is going on.
Installing Apache HTTPd agent for New Relic
1) I’m using the MeetMe New Relic Agent to monitor Apache HTTPd. It’s written in python and we’ll need to install pip. The following is using the Ubuntu python-pip package. You can find alternative install methods from pip docs.
apt-get install python-pip libyaml-dev python-dev
2) Next use pip to install newrelic-plugin-agent. When I ran it I got some errors but it still worked.
pip install newrelic-plugin-agent
3) Next we’ll need to create the configuration file for the agent. You can start by copying /opt/newrelic-plugin-agent/newrelic-plugin-agent.cfg or just use what I have posted below. The first thing you need is to set license_key. You can find your license key from your account settings page on rpm.newrelic.com. The second one is to add apache_httpd configuration. You can add multiple httpds to monitor.
cat - <<EOF>> /etc/newrelic/newrelic-plugin-agent.cfg
%YAML 1.2
---
Application:
 license_key: YOUR_LICENSE_KEY
 wake_interval: 60
 #newrelic_api_timeout: 10
 #proxy: http://localhost:8080

 apache_httpd:
  - name: localhost
    scheme: http
    host: localhost
    verify_ssl_cert: true
    port: 80
    path: /server-status

Daemon:
 user: newrelic
 pidfile: /var/run/newrelic/newrelic-plugin-agent.pid

Logging:
 formatters:
   verbose:
     format: '%(levelname) -10s %(asctime)s %(process)-6d %(processName) -15s %(threadName)-10s %(name) -45s %(funcName) -25s L%(lineno)-6d: %(message)s'
 handlers:
   file:
     class : logging.handlers.RotatingFileHandler
     formatter: verbose
     filename: /var/log/newrelic/newrelic-plugin-agent.log
     maxBytes: 10485760
     backupCount: 3
 loggers:
   newrelic_plugin_agent:
     level: INFO
     propagate: True
     handlers: [console, file]
   requests:
     level: ERROR
     propagate: True
     handlers: [console, file]
EOF
4) Make sure you have enabled mod_status in your apache and you’ve allowed access from the host your agent is running if it’s not running in the same host as your apache.
5) Then we need to add a init script for the newrelic-plugin-agent. There’s one under /opt/newrelic-plugin-agent but for me it was incomplete file so I just downloaded the one from github.
wget https://raw.githubusercontent.com/MeetMe/newrelic-plugin-agent/master/etc/init.d/newrelic-plugin-agent.deb
mv newrelic-plugin-agent.deb /etc/init.d/newrelic-plugin-agent
chmod 755 /etc/init.d/newrelic-plugin-agent
update-rc.d newrelic-plugin-agent defaults
Now you can start the newrelic-plugin-agent with
service newrelic-plugin-agent start
Now in few minutes you should see your Apache HTTPd server(s) listed under Plugins HTTPd on rpm.newrelic.com.


